
Photo-ready makeup is essential for photography, ensuring a polished look that enhances features and withstands camera lighting․ It involves techniques like defined brows, bold eyes, and flawless skin preparation for a camera-ready appearance․
1․1 Understanding the Importance of Camera-Ready Makeup
Camera-ready makeup is crucial for photography as it ensures your features stand out and look polished under various lighting conditions․ Unlike everyday makeup, photo-ready looks require more contrast and structure to avoid appearing flat or washed out in images․ Proper techniques enhance natural beauty while addressing lighting challenges, such as flash or harsh illumination․ Defined brows, bold eyes, and flawless skin preparation are key elements that create a balanced, camera-friendly appearance․ This approach ensures your makeup withstands the demands of photography, maintaining a fresh and vibrant look throughout․ Understanding these principles helps you achieve a professional, picture-perfect finish tailored to your skin type and personal style․
1․2 Brief Overview of Key Makeup Techniques for Photography
Mastering key makeup techniques for photography ensures a polished, camera-ready appearance․ Start with proper skin preparation, including cleansing, toning, and moisturizing, to create a smooth base․ Primer is essential for extending makeup wear and reducing pores․ Foundation should be applied evenly, matching your skin tone for a natural look, and blended seamlessly for coverage․ Defining features like brows and eyes is crucial—filled brows frame the face, while bold eyeliner or eyeshadow adds depth․ Layering products, such as cream and powder formulas, enhances longevity and avoids flatness in photos․ Highlighting and contouring can add dimension, but avoid excessive shimmer to prevent flashback․ Finally, set everything with translucent powder and a setting spray to ensure your look lasts and photographs flawlessly under any lighting․
Skin Preparation
Skin preparation is vital for photo-ready makeup․ Start with cleansing and toning to create a smooth base, followed by moisturizing to hydrate and prime for flawless makeup application․
2․1 Cleansing and Toning for a Smooth Base
Cleansing and toning are the foundation of photo-ready skin preparation․ Start with a gentle cleanser to remove dirt and impurities, ensuring a clean canvas for makeup․ Use a toner tailored to your skin type to balance pH levels and tighten pores․ For oily skin, opt for a clarifying toner, while dry skin benefits from a hydrating formula․ This step ensures a smooth, even surface for makeup application and helps prevent caked-on effects in photos․ Proper cleansing and toning also enhance the longevity of your makeup, ensuring it stays flawless under camera lighting and various conditions․ By addressing skin texture and tone early, you set the stage for a polished, professional finish․
2․2 Moisturizing: The Foundation of Flawless Makeup
Moisturizing is a crucial step in achieving photo-ready skin, as it hydrates and prepares the skin for makeup․ Use a deeply hydrating moisturizer suitable for your skin type to ensure a smooth, even base․ Dry skin requires intense hydration to prevent flakiness and creasing, while oily skin benefits from lightweight, oil-free formulas․ Proper hydration ensures makeup adheres evenly and lasts longer․ For photography, avoid overly shiny moisturizers, as they can cause unwanted glare in photos․ Instead, opt for a product that leaves a natural, matte finish․ This step is essential for creating a flawless canvas that enhances the overall makeup look and ensures it translates well under camera lighting․ By prioritizing hydration, you set the stage for a polished, professional finish that withstands the demands of photography․
2․3 Primer Application for Long-Lasting Coverage
Primer is a vital step in creating a long-lasting, photo-ready makeup look․ It smooths the skin’s texture, reduces the appearance of pores, and ensures even foundation application․ For oily skin, opt for a silicone-based, matte primer to control shine and extend wear․ Dry skin benefits from an illuminating primer for a radiant, lit-from-within glow․ Apply primer after moisturizing but before foundation, using a small amount to cover the entire face․ This step helps makeup stay in place under harsh lighting and prevents unwanted smudging or fading․ By priming, you create a stable canvas for your makeup, ensuring it looks fresh and polished throughout the photoshoot․ This essential step is key to achieving a flawless, professional finish that withstands the demands of photography․
2․4 Addressing Skin Concerns for Photography
Addressing skin concerns is crucial for achieving a flawless, camera-ready look․ For acne or blemishes, use a high-coverage concealer that matches your skin tone to spot-treat areas․ Redness can be neutralized with a green-tinted primer or concealer․ Dull skin can be brightened with a vitamin C serum or illuminating primer․ Hydration is key for dry skin—apply a deeply nourishing moisturizer and consider a hydrating spray for touch-ups․ Oily skin requires oil-control products like blotting papers or a matte primer to prevent shine․ For uneven texture, exfoliate gently and use a smoothing primer to create a uniform base․ Makeup can enhance your look, but healthy, prepared skin is the foundation of a photo-perfect appearance․ By addressing these concerns, you ensure your makeup looks seamless and polished in every shot․
Foundation and Base
A flawless foundation is the backbone of photo-ready makeup․ Choose a formula with medium to full coverage and neutral-warm undertones to complement your skin tone․ Apply evenly, blending thoroughly for a seamless base that lasts, ensuring your makeup looks polished in every shot․
3․1 Choosing the Right Foundation Formula
Selecting the right foundation formula is crucial for a photo-ready base․ Opt for a medium to full-coverage foundation with a neutral-warm undertone to complement your skin tone․ For oily skin, consider a matte, oil-control formula, while dry skin benefits from a hydrating or illuminating foundation․ Silicone-based foundations are ideal for photography as they create a smooth, even finish․ Avoid shimmer or glitter finishes, as they can cause flashback in photos․ Instead, choose a formula that offers a natural, radiant finish․ Layering cream and powder products ensures longevity and dimension․ Pair your foundation with a compatible primer to enhance stay and prevent pilling․ Test your foundation under different lighting conditions to ensure it looks flawless in every shot, making adjustments as needed for the perfect camera-ready base․
3․2 Matching Foundation to Skin Tone
Matching your foundation to your skin tone is essential for a natural, seamless look in photos․ Test foundation shades on your jawline to find a shade that blends effortlessly into your skin․ Consider your undertones: cool tones look best with pink-based foundations, while warm tones suit yellow or golden undertones․ Neutral tones can work with either․ Avoid shades that are too light or dark, as they can appear unnatural on camera․ For photography, opt for a shade that matches your natural skin color to avoid harsh lines or mismatched tones․ If necessary, mix two shades to create your perfect match․ Additionally, consider how lighting affects the color—test the foundation in both natural and artificial light to ensure it looks consistent․ Properly matching your foundation ensures a flawless base that enhances your features without looking cakey or artificial in photos․
3․3 Applying Foundation for a Natural Look
Applying foundation for a natural look involves blending it seamlessly into your skin․ Use a foundation brush or beauty blender to apply it in light, even strokes, starting from the center of your face and blending outward toward the hairline and jawline․ Focus on one section at a time, such as the forehead, cheeks, and chin, to ensure full coverage․ Gently press the blender or brush to blend edges for a smooth finish․ For a natural effect, build coverage gradually rather than applying too much at once․ Avoid heavy layers, as they can appear cakey in photos․ Ensure the foundation blends well into the neck and jawline to prevent visible lines․ This technique creates a cohesive, natural appearance that looks flawless in pictures while maintaining the illusion of bare skin․
3․4 Blending Techniques for Seamless Coverage

Blending is a crucial step in achieving seamless coverage for photo-ready makeup․ Start by applying foundation or concealer to one area, such as the under-eye or blemishes, and blend outward with a brush or beauty blender․ Use light, feathering strokes to soften edges and merge the product into the skin․ For cream or liquid products, press the blender gently into the skin to ensure the product melts into your natural texture․ When layering, allow each layer to set before adding more, preventing cakey buildup․ Blend upward and outward to lift features and avoid dragging the skin․ Pay special attention to areas like the hairline, jawline, and edges of the face, where harsh lines can be visible in photos․ Proper blending ensures a natural, flawless finish that looks polished on camera․

Eye Makeup
Eyes are a focal point in photos, requiring bold definition․ Brows frame the face, while eyeliner and eyeshadow add depth․ Waterproof mascara ensures lashes stay voluminous and smudge-free, enhancing the overall look for cameras․
4․1 Brow Tips: Shaping and Filling
Brows are essential for framing the face in photos, requiring definition and boldness․ Use a brow tint or pomade for full, opaque coverage that shows clearly in pictures․ Start by shaping your brows to complement your face shape, ensuring symmetry․ Comb through brows with a spoolie or brow comb to achieve a natural, polished look․ For sparse areas, fill in lightly with short, feathery strokes to mimic hair growth․ Avoid harsh lines by blending gently․ Define the arch to lift your features and balance your face․ Set brows in place with a brow gel to maintain shape and prevent smudging․ Clean up around the brows with concealer for a sharp, professional finish․ Well-groomed, defined brows instantly enhance your overall makeup look in photos․
4․2 Eyeliner Techniques for Different Looks
Eyeliner is a key component in photography makeup, helping to define and enhance the eyes; For a classic look, opt for a subtle cat eye, while a smoky eye adds drama․ Use a liquid or gel liner for precise application․ Start with a soft line along the upper lash line, then wing it slightly at the outer corner for depth․ For a grungy vibe, apply heavier eyeliner close to the lashes․ To keep eyes open, especially with dark liner, add a nude or white pencil to the lower waterline․ This balances bold looks and prevents eyes from appearing small․ Waterproof mascara is essential to prevent smudging․ Blend liner softly for a more natural effect or sharp for a glamorous look․ Define your personal style with these techniques to create striking, camera-ready eyes that stand out in photos․
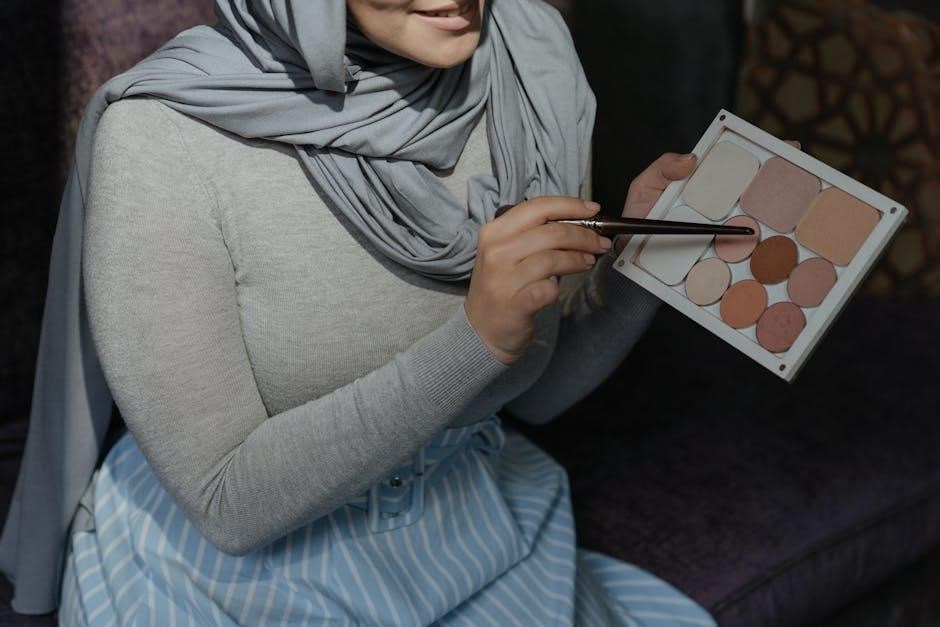
4․3 Eyeshadow Application for Depth and Dimension
Eyeshadow plays a crucial role in adding depth and dimension to the eyes in photos․ Start by applying a light, neutral shade across the lid to act as a base․ Use a medium-toned shade in the crease to create depth, blending softly for a seamless transition․ For a dramatic look, apply a dark shade along the outer corner of the eye․ Highlight the brow bone with a shimmery light shade to lift the eyes․ To enhance dimension, layer cream eyeshadows first, then set with powder․ Avoid overly shimmery formulas that may catch light awkwardly․ Blend thoroughly to prevent harsh lines, as cameras can accentuate imperfections․ Smoky eyes, achieved with gradual shading, add glamour, while softer transitions create a natural look․ Proper blending ensures eyes appear defined yet effortless, making them stand out in photos․
4․4 Mascara: Enhancing Lash Volume and Length
Mascara is a key component of photo-ready eye makeup, enhancing lash volume and length for a dramatic effect․ To maximize impact, choose a waterproof formula to prevent smudging under bright lights or humidity․ Start by coating the upper lashes, wiggling the wand from base to tip to separate lashes and build volume․ Lightly apply to the lower lashes for a balanced look․ Avoid clumping by using a clean wand or a lash comb․ Opt for a mascara with a thickening or lengthening brush, depending on your lash type․ For photos, dark shades like black or dark brown create contrast, while brown tones soften the look․ Proper application ensures lashes appear defined and voluminous, making the eyes stand out in pictures․ This step is essential for framing the eyes and completing the overall makeup look․
4․5 Highlighting the Under-Eye Area
Highlighting the under-eye area is crucial for creating a bright, awake look in photos․ Use a concealer one shade lighter than your foundation to cover dark circles and puffiness․ Gently pat the product with a brush or ring finger, blending well to avoid harsh lines․ Set the area with a light, translucent powder to prevent creasing․ For photography, avoid heavy or cakey products, as they can accentuate texture under camera lights․ Opt for a light to medium coverage concealer with a smooth, creamy texture․ This step ensures your eyes appear more open and rested, enhancing the overall makeup look․ Proper highlighting also helps balance bold eye makeup, such as smoky eyes or heavy eyeliner, by creating contrast and depth in photos․
4․6 Smoky Eyes for a Dramatic Effect

A smoky eye look adds depth and drama, making it ideal for photography․ Start with a light base shade on the lid to act as a primer․ Apply a medium-toned eyeshadow in the crease for dimension, blending upward and outward for a seamless transition․ Use a darker shade on the outer corner to create depth and a smoky effect․ Highlight the brow bone with a light, neutral shade for contrast․ Line the upper lash line with a pencil or liquid eyeliner, winging it slightly for a bold finish․ Smudge the liner for a softer, more dramatic look․ Coat lashes with waterproof mascara to enhance volume and length․ Avoid shimmer products, as they can reflect unevenly in photos․ Proper blending is key to ensuring the look translates well on camera, creating a polished, dramatic effect that stands out in pictures․
Lip Care and Makeup
Lip care is crucial for a photo-ready look․ Exfoliate and hydrate lips before applying makeup․ Choose a semi-matte lipstick or gloss for even, long-lasting color and hydration․ Avoid shimmer to prevent flash reflection․
5․1 Prepping Lips for Smooth Application
Prepping your lips is essential for a smooth and even makeup application․ Start by gently exfoliating your lips using a sugar scrub or a warm washcloth to remove dead skin cells․ This creates a smooth canvas for lipstick or gloss․ Next, apply a hydrating lip balm or mask to soften and moisturize your lips․ Allow the product to absorb fully before blotting away any excess with a tissue․ Avoid using shimmer-based products, as they can reflect light unevenly in photos․ Properly prepped lips ensure long-lasting, vibrant color and prevent feathering or uneven application․ This step is crucial for achieving a polished, camera-ready look in your photoshoot․
5․2 Choosing the Right Lipstick Color
Selecting the right lipstick color is key to enhancing your natural beauty in photos․ Opt for a shade that complements your skin tone—cool tones look stunning in blue-based pinks or deep berries, while warm tones shine with coral, peach, or caramel hues․ Neutral skin tones can pull off a wide range of colors, from soft nudes to bold reds․ For photography, choose a semi-matte or highly pigmented lipstick to ensure vibrant, even color that won’t fade under camera lights․ Avoid shimmery or overly glossy finishes, as they can reflect light unevenly․ Consider the overall makeup look and personal style to ensure the lipstick enhances the entire face․ A well-chosen color adds confidence and creates a polished, camera-ready appearance․
5․3 Applying Lip Liner for Definition
Applying lip liner is a crucial step for creating defined, camera-ready lips․ Start by selecting a liner that matches your natural lip color or the shade of your lipstick․ Gently outline the natural shape of your lips, beginning at the Cupid’s bow and working your way around the edges․ Use short, precise strokes to ensure accuracy․ For a more polished look, fill in the entire lip area with the liner, blending it toward the center to create a seamless base․ This step prevents feathering and ensures lipstick stays in place․ To enhance definition, slightly overline the lips if desired, but keep it subtle for a natural appearance․ Properly applied lip liner adds structure, frames the face, and ensures lips look sharp and defined in photos․

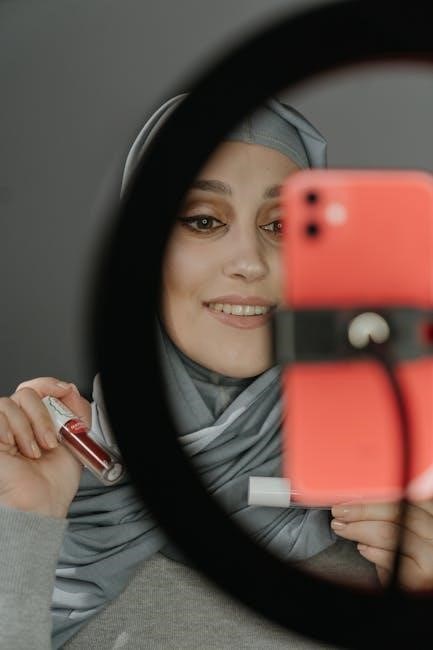
5․4 Lipstick and Gloss Application
Lipstick and gloss are the final touches to enhance your photo-ready look․ Start by applying a semi-matte or highly pigmented lipstick that complements your skin tone and overall makeup․ Use a lip liner as a base for precise application and to prevent feathering․ Gently blot the lips with a tissue to ensure the color adheres evenly․ For added dimension and hydration, apply a thin layer of gloss to the center of your lips, blending it outward for a natural finish․ Avoid overly shiny glosses that may reflect light harshly in photos․ Instead, opt for a subtle, hydrating formula that enhances lip shape without appearing greasy․ Finally, set your look with a setting spray to ensure longevity and a flawless appearance in every shot․

5․5 Maintaining Lip Hydration
Maintaining lip hydration is crucial for a photo-ready look, as dry or chapped lips can detract from your overall appearance․ Begin by exfoliating your lips with a gentle scrub to remove dead skin cells, ensuring a smooth canvas for lipstick or gloss․ Apply a hydrating lip balm rich in ingredients like hyaluronic acid or coconut oil before makeup to lock in moisture․ During the photoshoot, reapply a lightweight, non-greasy balm or gloss to maintain hydration and add shine․ Avoid over-lining or using overly drying products, as they can emphasize dryness in photos․ For lasting hydration, layer a hydrating primer under your lipstick or gloss․ This step ensures your lips stay soft, supple, and camera-ready throughout the session, balancing both aesthetics and comfort․
Setting Your Look
Setting your look ensures makeup longevity and a fresh appearance in photos․ Use translucent powder to mattify and a setting spray to lock in your makeup seamlessly, controlling shine and preventing fade․
6․1 Translucent Powder for Setting Makeup
Translucent powder is a must-have for setting makeup in photos․ It mattifies the skin, reduces shine, and ensures a smooth finish without altering your foundation color․ When applied correctly, it prevents flashback in photos and extends makeup wear․ Use a light hand and a fluffy brush to dust the powder across the T-zone and under the eyes․ Avoid over-powdering, as it can appear cakey on camera․ For oily skin, focus on areas prone to shine, while dry skin should apply sparingly․ Translucent powder is especially beneficial for photography, as it creates a soft, natural-looking base that withstands harsh lighting․ By setting your makeup with translucent powder, you ensure a polished, photo-ready finish that looks flawless in every shot․
6․2 Setting Spray: Ensuring Longevity
Setting spray is the final step in ensuring your makeup stays long-lasting and camera-ready․ It locks all products in place, preventing smudging or fading, especially under bright lights or flashes․ Choose a spray that suits your skin type—matte for oily skin and hydrating for dry skin․ Hold the bottle 6-8 inches away and mist evenly, allowing it to set without disturbing your makeup․ This step is crucial for flawless photography, as it maintains your look throughout the shoot․ By sealing your makeup, setting spray helps you avoid touch-ups and ensures a professional finish in every photo․ It’s an essential tool for keeping your makeup fresh and polished all day long․

Additional Tips for Photography
For photography, apply makeup in natural light to ensure accuracy․ Opt for a natural, balanced look to avoid heaviness in photos․ Stay hydrated to maintain fresh, radiant skin․
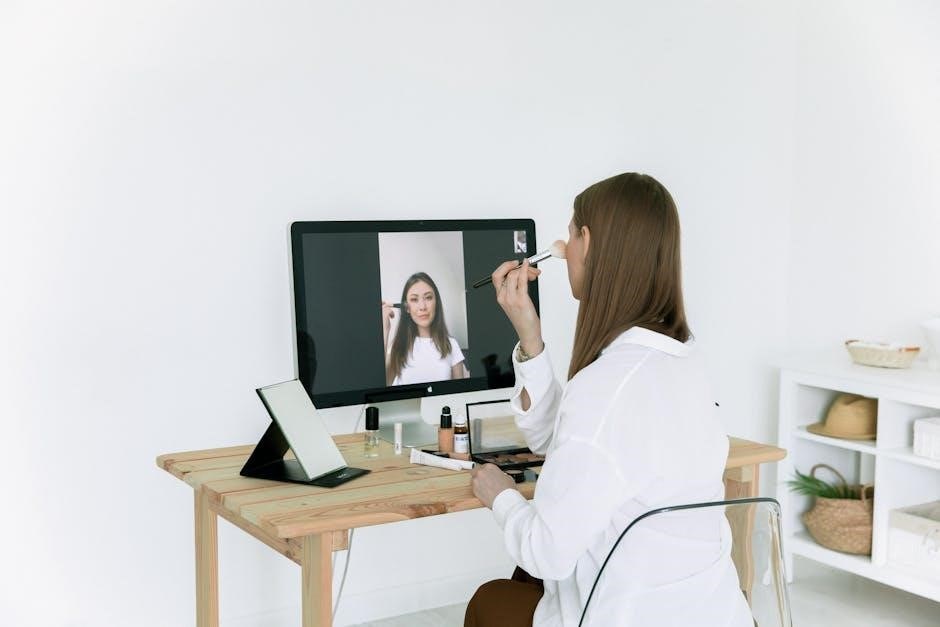
7․1 Testing Looks with Photos
Testing your makeup look with photos is essential to ensure it translates well on camera․ Take selfies under different lighting conditions to assess how your makeup appears․ Natural light is ideal for accuracy, while flash can reveal potential issues like flashback or uneven coverage․ This step allows you to identify areas needing adjustment, such as enhancing definition or toning down bold features․ Practice makes perfect, so experiment with various looks and lighting setups to refine your technique․ The goal is to achieve a polished, camera-ready appearance that looks stunning in every shot․
- Use natural light for accurate results․
- Test with flash to check for flashback or coverage issues․
- Adjust your look based on photo feedback․
7․2 Practicing Makeup Application
Mastering photo-ready makeup requires consistent practice to refine your skills and adapt to your features․ Dedicate time to experiment with different techniques, such as layering products or achieving seamless blends․ Observing tutorials and guides can provide valuable insights, helping you understand how to enhance your natural beauty for the camera․ Regular practice allows you to identify what works best for your skin type and personal style․ Over time, you’ll develop a keen eye for detail, ensuring your makeup looks polished and professional in every photo․
- Regular practice helps refine your technique․
- Experiment with layering and blending for a flawless finish․
- Adapt your look to complement your features and skin type․
7․3 Staying Hydrated and Comfortable
Staying hydrated and comfortable is crucial for maintaining a fresh, photo-ready appearance․ Drinking plenty of water ensures your skin remains hydrated from the inside out, preventing dryness and flakiness that can ruin your makeup look․ Additionally, using hydrating products like moisturizers and setting sprays helps keep your skin balanced and comfortable throughout the photoshoot․ Avoid heavy or suffocating formulas that can cause discomfort or shine under camera lights․ Taking breaks to touch up and rehydrate ensures your makeup stays flawless and your skin feels great․ Remember, comfort and hydration are key to looking and feeling your best in every photo․
- Drink water to keep your skin hydrated and plump․
- Use hydrating products to maintain skin balance․
- Avoid heavy formulas that cause discomfort or shine․
- Take breaks to touch up and rehydrate․