Article Plan: Honeywell TH3210D1004 Installation Manual
This comprehensive guide provides step-by-step instructions for installing the Honeywell TH3210D1004 thermostat. It covers pre-installation checks‚ removing the old thermostat‚ preparing the wall‚ wiring‚ mounting‚ testing‚ and setting up the device. The manual also includes maintenance tips and troubleshooting solutions. Detailed diagrams and compatibility information ensure a smooth installation process for heat pump systems. Available as a free PDF download.
Welcome to the installation manual for the Honeywell TH3210D1004‚ a non-programmable digital thermostat designed for 24 VAC heat pump systems with auxiliary heat (2 heat/1 cool). This guide is intended to help homeowners and technicians install‚ configure‚ and operate the thermostat efficiently. The Honeywell TH3210D1004 is part of the PRO 3000 Series‚ offering precise electronic control and easy-to-use features for optimal climate management.
This manual provides detailed instructions for installing the thermostat‚ including pre-installation checks‚ wiring‚ and mounting. It also covers setup and customization options to ensure the device works seamlessly with your heating and cooling system. The thermostat features a large‚ clear‚ backlit display for easy readability‚ even in low-light conditions.
Before starting the installation‚ it is essential to review the entire manual to understand the process and requirements. Proper installation ensures reliable performance‚ energy efficiency‚ and safety. The Honeywell TH3210D1004 is designed to be user-friendly‚ but it must be installed by a trained technician or experienced individual to avoid damage to the product or system.
Key features of the Honeywell TH3210D1004 include:
- Non-programmable digital control for simplicity and ease of use.
- Compatible with 24 VAC heat pump systems with auxiliary heat.
- Backlit display for clear visibility in any lighting condition.
- Front-load battery compartment for easy maintenance.
By following the instructions in this manual‚ you will be able to install and configure the Honeywell TH3210D1004 thermostat correctly‚ ensuring optimal performance and energy efficiency for your home. Always refer to the manufacturer’s guidelines for any specific requirements or recommendations.
Proceed to the next section for the pre-installation checklist to ensure you have everything needed before starting the installation process.

Pre-Installation Checklist
Before installing your Honeywell TH3210D1004 thermostat‚ it is crucial to complete the following pre-installation checklist to ensure a smooth and safe installation process. This step helps verify compatibility‚ prepares necessary tools‚ and prevents potential issues during setup.
Turn Off Power: Switch off the power to your HVAC system at the circuit breaker or fuse box. Verify that the system is completely powered down before proceeding.
Check System Compatibility: Ensure the Honeywell TH3210D1004 is compatible with your heating and cooling system. This thermostat is designed for 24 VAC heat pump systems with auxiliary heat (2 heat/1 cool). Verify compatibility with your system’s voltage and configuration.
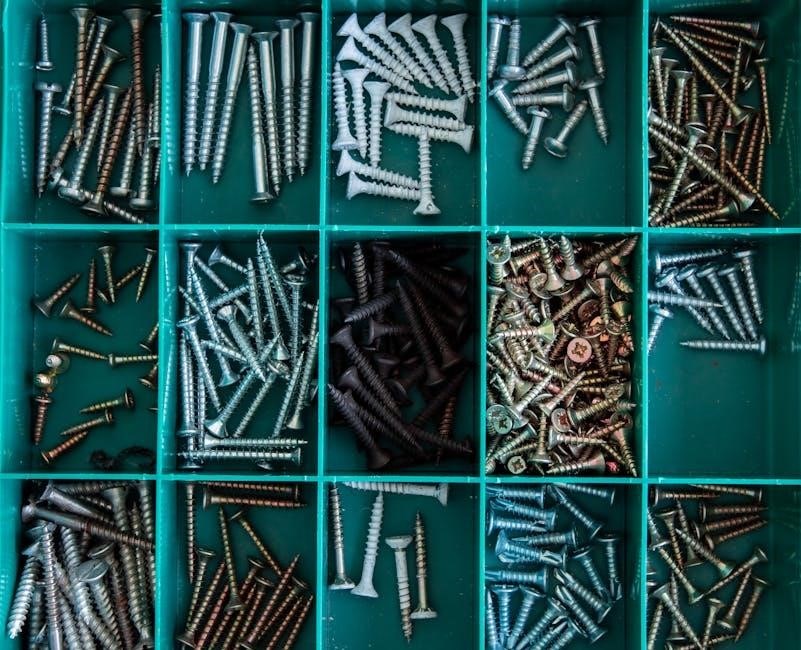
Gather Tools and Materials: Collect all necessary tools and materials‚ including a screwdriver‚ wire strippers‚ drill‚ wall anchors‚ screws‚ and a level. Ensure you have the installation manual and any additional documentation provided with the thermostat.
Understand Wiring Configuration: Familiarize yourself with your system’s wiring. The Honeywell TH3210D1004 requires specific wiring connections‚ which are detailed in the installation manual. If you are unsure‚ consult a licensed technician.
Prepare the Wall: Inspect the wall where the thermostat will be mounted. Ensure it is level‚ clean‚ and free of obstructions. If necessary‚ repair any damaged areas before proceeding.
Verify Thermostat Components: Check that all components‚ including the wallplate‚ wiring‚ and thermostat unit‚ are included and undamaged.
Set Up the Thermostat: Before mounting‚ configure the thermostat’s basic settings‚ such as the heating/cooling system type and preferred temperature range‚ as outlined in the manual.
Ensure Safety: Wear protective gear‚ such as safety glasses‚ when drilling or handling electrical components. Follow all safety guidelines to avoid injury or damage to the system.
By completing this checklist‚ you will be well-prepared to install your Honeywell TH3210D1004 thermostat safely and efficiently. Proceed to the next section for instructions on removing the old thermostat.
Removing the Old Thermostat
Before installing the Honeywell TH3210D1004‚ you must remove the existing thermostat. This step is crucial to ensure a smooth transition and prevent any interference with the new system. Follow these steps carefully to disconnect and remove the old thermostat safely.
Turn Off Power: Locate the circuit breaker or fuse box that controls your HVAC system. Switch off the power to avoid any accidental start-ups or electrical hazards during the removal process. Verify that the system is completely powered down by checking the thermostat display or ensuring no airflow is present.
Detach the Thermostat: Gently pull the old thermostat away from the wall. If it does not come off easily‚ check for any screws or clips holding it in place. Remove any visible screws using a screwdriver‚ then carefully lift the unit away from the wallplate.
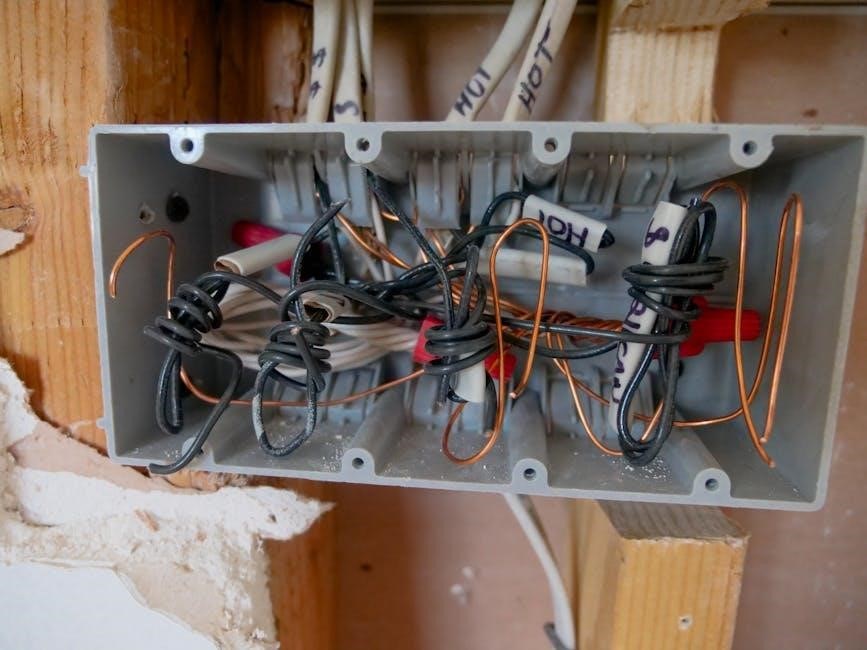
Label the Wires: Identify and label the wires connected to the old thermostat. Use a marker or labels to note which wire corresponds to each terminal (e.g.‚ R‚ W‚ Y‚ G‚ C). This step is essential for proper wiring of the new thermostat. If the wires are not clearly marked‚ take a photo or make a sketch for reference.
Disconnect the Wires: Loosen the terminal screws on the old thermostat and gently pull the wires free. Handle the wires with care to avoid damaging them. If the wires are stuck‚ use a pair of pliers to carefully release them.
Remove Wallplate and Anchors: If the old wallplate or anchors are damaged or outdated‚ remove them completely. Use a screwdriver to remove any remaining screws or clips. Lightly sand the wall surface if necessary to prepare it for the new thermostat.
Set Aside Old Components: Place the old thermostat‚ wallplate‚ and any screws or wires in a safe location to avoid loss or misplacement. These components may be needed for reference or disposal later.
By following these steps‚ you can safely and effectively remove the old thermostat. This ensures a clean and ready workspace for installing the Honeywell TH3210D1004. Proceed to the next section for wall preparation instructions.

Preparing the Wall
Before mounting the Honeywell TH3210D1004 thermostat‚ ensure the wall is properly prepared to accommodate the new device. This step is essential for a secure and level installation. Follow these instructions to prepare your wall:
Inspect the Wall: Check the area where the thermostat will be mounted for any damage‚ such as cracks or uneven surfaces. If necessary‚ repair the wall to ensure a smooth installation. Clean the wall to remove dust‚ dirt‚ or old adhesive that might interfere with the installation.
Ensure the Wall is Level: Use a spirit level to confirm the wall is straight. If the wall is uneven‚ the thermostat may not mount properly‚ leading to inaccurate temperature readings. Mark the area with a pencil to guide the installation.
Mark Hole Positions: Position the wallplate (provided with the thermostat) against the wall and use a pencil to mark the screw holes. If the wallplate has a built-in level‚ align it to ensure accuracy. For plaster walls‚ mark the hole locations carefully to avoid damaging the surface.
Drill Holes (if necessary): If the wall requires anchors or screws‚ drill pilot holes at the marked positions. Use a drill bit appropriate for your wall type (e.g.‚ drywall‚ plaster‚ or wood). Insert wall anchors if needed to provide additional support.
Install Wall Anchors: Gently screw the wall anchors into the drilled holes until they are flush with the wall surface. This step prevents the screws from pulling out of the wall over time.
Clean Up: Remove any debris or dust from the drilling process. Wipe the wall clean with a damp cloth to ensure a smooth installation.
By preparing the wall correctly‚ you ensure a stable and secure installation for your Honeywell TH3210D1004 thermostat. Proceed to the wiring section once the wall is ready.
Wiring the New Thermostat
Wiring the Honeywell TH3210D1004 thermostat is a critical step in the installation process. Proper wiring ensures the thermostat functions correctly and safely. Follow these steps carefully to wire your new thermostat:
Turn Off Power: Before starting‚ switch off the power to your heating/cooling system at the circuit breaker or fuse box. Verify the system is completely off to avoid any electrical hazards.
Remove the Old Thermostat: Gently pull the old thermostat away from the wall. Be careful not to damage the wires. Label each wire with its corresponding terminal (e.g.‚ R‚ W‚ Y‚ G‚ C) to ensure proper connection to the new thermostat.
Identify the Wires: Familiarize yourself with the wires and their terminals. The most common terminals are:
- R: 24V AC power (usually red)
- W: Heat stage (usually white)
- Y: Cooling stage (usually yellow)
- G: Fan (usually green)
- C: Common (usually black)
Connect the Wires: Insert the wires into the corresponding terminals on the new thermostat. Secure them tightly by screwing down the terminal screws. Double-check that each wire is connected to the correct terminal to avoid system malfunctions.
Mount the Thermostat Wallplate: If not already mounted‚ attach the wallplate to the wall using the screws provided. Ensure it is level and secure.
Attach the Thermostat: Snap the thermostat onto the wallplate. Ensure it clicks securely into place.
Turn On Power: Restore power to your heating/cooling system and test the thermostat to ensure it operates correctly. Check both heating and cooling modes to confirm proper function.
Verify Compatibility: The Honeywell TH3210D1004 is designed for 24V AC heat pump systems with auxiliary heat (2 heat/1 cool). Ensure your system matches these specifications for optimal performance.
For heat pump systems‚ verify the wiring configuration matches the thermostat’s settings. If unsure‚ consult a licensed HVAC technician for assistance.
Proper wiring is essential for the thermostat to control your heating and cooling system effectively. If you encounter any issues‚ refer to the troubleshooting section or contact a professional.
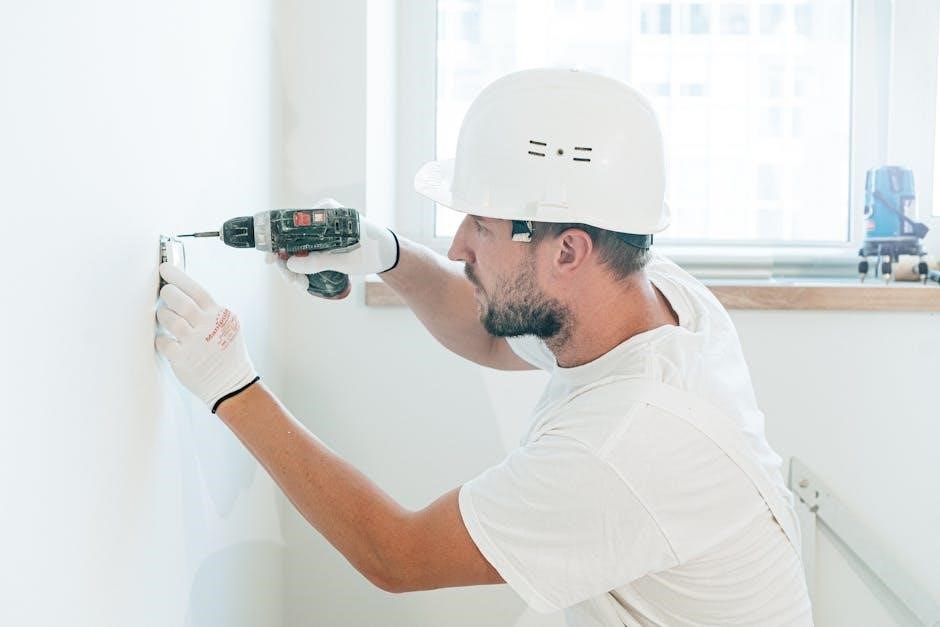
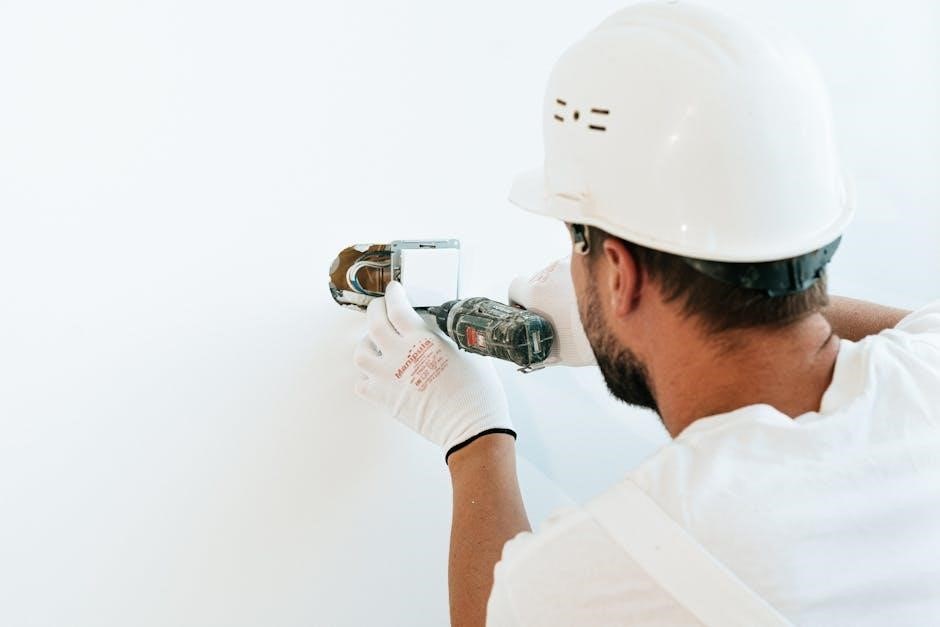
Mounting the Thermostat
Mounting the Honeywell TH3210D1004 thermostat is a straightforward process that requires careful attention to ensure proper installation. Follow these steps to securely mount your new thermostat:
Prepare the Wallplate: Start by removing the wallplate from the thermostat. This is typically done by gently pulling it away from the device. Set the thermostat aside for now.
Position the Wallplate: Locate the area on your wall where you want to mount the thermostat. Ensure it is level and accessible. Hold the wallplate against the wall and mark the screw holes with a pencil.
Drill Pilot Holes: Using a drill‚ create pilot holes at the marked positions. If your walls are plaster or drywall‚ consider using wall anchors to provide extra support and prevent the screws from loosening over time.
Mount the Wallplate: Insert the screws through the wallplate and into the pilot holes. Tighten them firmly to secure the wallplate to the wall. Make sure it is level and stable.
Route the Wires: Carefully feed the wires through the wire hole on the wallplate. Ensure there are no kinks or twists that could damage the wires or affect the thermostat’s performance.
Connect the Wires: Attach the wires to their respective terminals on the thermostat. Refer to the wiring diagram or the installation manual to ensure each wire is connected correctly.
Attach the Thermostat: Once the wires are securely connected‚ align the thermostat with the wallplate and snap it into place. Ensure it clicks firmly to confirm it is properly attached.
Final Check: Double-check that the thermostat is level and securely mounted. Test the thermostat by turning the power back on and ensuring it responds correctly to temperature adjustments.
Proper mounting ensures the thermostat operates efficiently and maintains accurate temperature control. If you encounter any issues‚ consult the troubleshooting section or contact a professional for assistance.
Testing the Thermostat
Testing the Honeywell TH3210D1004 thermostat is essential to ensure it functions correctly after installation. Follow these steps to verify its operation:
- Power-On Check: Turn the power back on at the circuit breaker. Ensure the thermostat’s display lights up and shows the current temperature.
- System Status: Switch between heating and cooling modes to confirm the HVAC system responds appropriately. Listen for the system to activate and deactivate.
- Temperature Accuracy: Compare the thermostat’s displayed temperature with a reliable thermometer. If there’s a discrepancy‚ adjust the thermostat’s calibration settings.
- Battery Check: Verify the battery level if your thermostat is battery-powered. Replace batteries if the level is low or if the low-battery indicator appears.
- Display Functionality: Ensure the backlit display is clear and functional. Test the brightness adjustment to confirm it works in various lighting conditions.
- Programmable Features: If applicable‚ set a simple program to test scheduling functionality. Ensure the thermostat transitions between settings accurately.
- System Compatibility: Confirm that the thermostat is correctly configured for your HVAC system type (e.g.‚ heat pump‚ forced air). Refer to the installation manual for guidance.
- Final Inspection: Check for any error messages or unusual behavior. Consult the troubleshooting section of the manual if issues arise.
By systematically testing each feature‚ you can ensure the Honeywell TH3210D1004 thermostat operates efficiently and meets your climate control needs.
Setting Up the Thermostat
Setting up the Honeywell TH3210D1004 thermostat is straightforward and allows for customization to suit your preferences. Begin by turning the power back on at the circuit breaker and ensuring the thermostat is properly mounted and wired. Use the push-button controls to navigate through the menu options on the backlit display.
- System Configuration: Select the appropriate HVAC system type (e.g.‚ heat pump‚ forced air‚ or radiant) to ensure proper operation. This step is crucial for accurate temperature control and system compatibility.
- Temperature Settings: Set your desired temperature range for both heating and cooling modes. You can adjust the temperature in 1-degree increments for precise control.
- Scheduling (if applicable): Although the TH3210D1004 is a non-programmable thermostat‚ some models allow basic scheduling. If your model supports this feature‚ set your preferred temperature settings for different times of the day.
- Display Options: Adjust the display brightness to suit your environment. The backlit display ensures visibility in low-light conditions.
- Battery Check: If your thermostat is battery-powered‚ monitor the battery level and replace batteries when the low-battery indicator appears to avoid system downtime;
- Final Review: Double-check all settings to ensure they align with your HVAC system and personal preferences. Save your configurations to complete the setup process.
By following these steps‚ you can optimize the performance of your Honeywell TH3210D1004 thermostat and enjoy consistent‚ reliable climate control in your home.
Maintenance and Troubleshooting
Regular maintenance ensures optimal performance and longevity of the Honeywell TH3210D1004 thermostat. Start by cleaning the device with a soft cloth to remove dirt or dust that may interfere with temperature sensing or display visibility.
Maintenance Tips
- Battery Check: If your thermostat is battery-powered‚ replace the batteries annually or when the low-battery indicator appears on the display.
- Wiring Inspection: Periodically inspect the wiring connections to ensure they are secure and free from damage or corrosion.
- System Compatibility: Verify that the thermostat is compatible with your HVAC system. For heat pump systems‚ ensure the correct configuration settings are applied.
Troubleshooting Common Issues
If the thermostat malfunctions‚ refer to the following solutions:
- Display Not Turning On: Check the circuit breaker or fuse box to ensure power is restored. For battery-powered models‚ replace the batteries if necessary.
- Incorrect Temperature Readings: Ensure the thermostat is mounted level and away from direct sunlight or drafts. Clean the temperature sensor if dirty.
- Unresponsive Buttons: Restart the thermostat by removing batteries (if applicable) for 10 seconds‚ then reinsert them. Clean the buttons with a soft cloth if dirty.
By adhering to these maintenance and troubleshooting steps‚ you can resolve common issues and maintain efficient operation of your Honeywell TH3210D1004 thermostat.
Disposal of the Old Thermostat
Proper disposal of the old thermostat is essential to minimize environmental impact and adhere to local regulations. Before disposing of your old Honeywell TH3210D1004 thermostat‚ ensure it is safely handled‚ especially if it contains hazardous materials like mercury‚ which may be present in older models.
Steps for Safe Disposal
- Check for Mercury Content: Verify if your old thermostat contains mercury. If it does‚ it must be disposed of as hazardous waste. Contact local waste management authorities for guidance on handling mercury-containing devices.
- Remove Batteries or Wiring: If the thermostat is battery-powered‚ remove the batteries before disposal. For hardwired systems‚ disconnect the wiring at the circuit breaker or fuse box before removing the device from the wall.
- Recycle or Dispose Responsibly: Many communities offer e-waste recycling programs or special collection events for thermostats and other electronic devices. Check with local recycling centers or retailers that accept thermostat recycling.
- Follow Local Regulations: Familiarize yourself with local laws regarding the disposal of electronic devices and hazardous materials. Improper disposal may result in environmental harm or legal consequences.
Additional Considerations
When replacing your old thermostat with the Honeywell TH3210D1004‚ consider donating or recycling the old unit if it is still functional. Many organizations accept working thermostats for reuse or refurbishment. If the thermostat is damaged beyond repair‚ ensure it is disposed of responsibly to protect the environment.
By following these steps‚ you can ensure the safe and eco-friendly disposal of your old thermostat while preparing for the installation of your new Honeywell TH3210D1004 model.
Installing the Honeywell TH3210D1004 thermostat is a straightforward process when you follow the steps outlined in this manual. By carefully preparing the site‚ wiring the system‚ and configuring the settings‚ you can ensure optimal performance and energy efficiency. The thermostat’s user-friendly design and advanced features make it an excellent choice for managing your home’s climate control needs.
After completing the installation‚ take a moment to review the setup and test all functions to confirm everything works as expected. Proper installation and configuration will not only enhance your comfort but also help reduce energy consumption and lower utility bills. If you encounter any issues during or after installation‚ refer back to the troubleshooting section or contact a licensed technician for assistance.
Final Tips
- Always keep the user manual handy for future reference or adjustments.
- Dispose of the old thermostat responsibly‚ adhering to local regulations.
- Explore the thermostat’s features‚ such as temperature settings and display options‚ to customize your experience.
- Schedule regular maintenance to ensure long-term reliability and performance.
With the Honeywell TH3210D1004 installed‚ you can enjoy precise temperature control and reliable operation for years to come. This thermostat is designed to meet your heating and cooling needs while providing ease of use and energy efficiency. If you have any further questions or need support‚ visit Honeywell’s official website or contact their customer service team.
Thank you for choosing Honeywell‚ and congratulations on successfully installing your new thermostat!